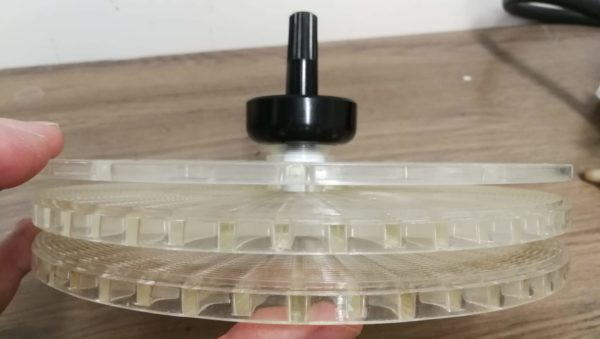
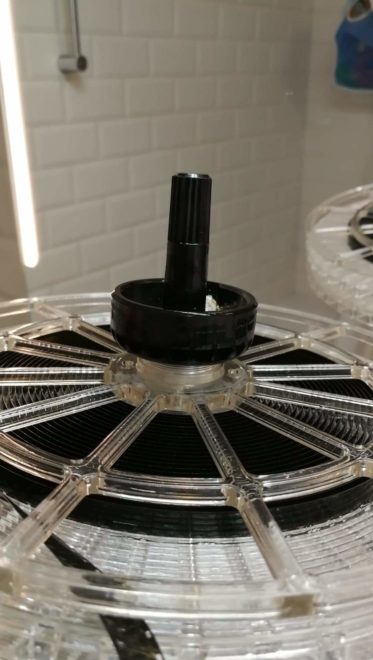
So, the infamous Lomo UPB-1A upper spool shaft / bolt /screw…
It failed, didn’t it? The M10 screw snapped off at the stem right away and there’s no glue that will hold. Known issue.
There are two fixes known to me, one is botching the job, is rather easy, but will fail some time soon. The other solution is to manufacture a replacement, but it is a bit more trouble.
The easy fix that won’t hold, but you will try it anyway…
- File (or face on a lathe) the rest of the stub on the knob part flat.
- Drill from the centre of the M14x1.5 hole with a 4.3mm bit (clearance for M4).
- File (or face) the snapped off boss flat.
- Drill the boss 3.3mm (tapping size for M4). Best done on a lathe.
- Cut M4 thread with a tap.
- Put M4x10 sink head bolt from inside of the M14x1.5 hole into the sheared off boss, but don’t tighten all the way in yet.
- Put some Loctite 480 or 4580 between the boss and the knob part, now tighten the M4 bolt with very little torque, leave to set.
May hold for a total of ten nanoseconds. The bolt will pull through the wall of the knob part (the upper part) or the threaded boss will start spinning because Loctite won’t hold to this plastic all that well. YMMV.
So, now that we are on the same page, lets get about making the replacement part.
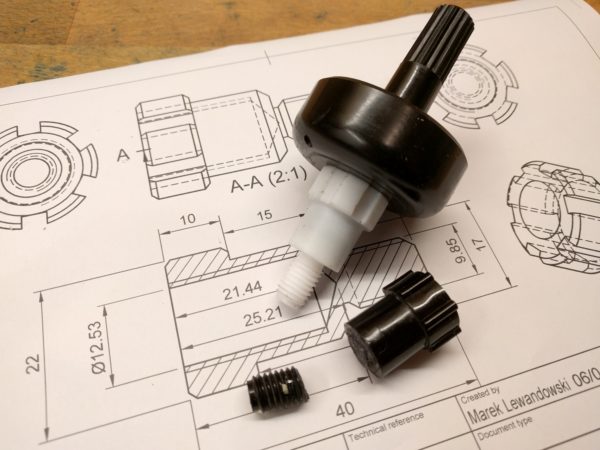
Why is this part so challenging? Here is what it should look like (click on the link below to get a printable PDF)

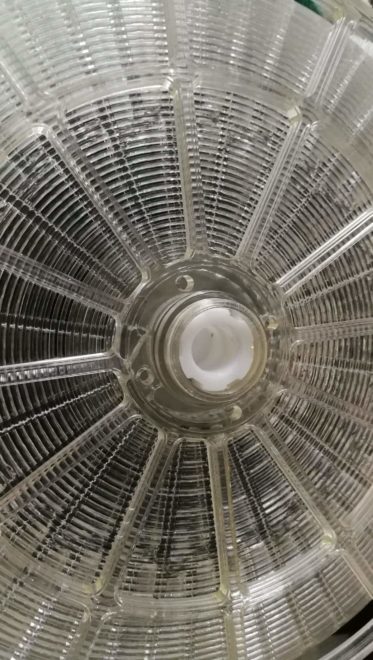
Have a look at the cross section and you will soon realize, where the difficulty comes from. The M14x1.5 threaded boss, that goes into this part, is 20mm long and is threaded to within 0.5mm from the tip. The threaded hole that accepts this boss can be at most ca. 22.5mm deep before it weakens the wall at the right hand side (see cross section). You can’t drill this hole with an ordinary drill bit, because the pointy tip will cause the M10 bolt to fall off before your hole wall depth reaches 20mm. Even once you get this hole bored with a square bottom, you have to get the M14 thread fully formed to within 2.5-3mm (about 1.5-2 turns) from the hole bottom. No machine taps and few hand taps will cut to such depth, so you’d best use a single-point tool to cut this internal thread, but that’s gonna hit a different issue (I’ll elaborate later on this).
You will need the following tools:
- A lathe. Sorry, this can’t be done without one.
- A sharp right-hand outside tool, e.g. SDJCR-ish. I use carbide inserts, for plastic sharp HSS tooling would be better, I just don’t have any that’s sharp on hand.
- Tailstock chuck able to chuck up to at least 12mm drill bits
- Center drill
- Dead (or live) center
- A sharp, center cutting 12mm drill bit or a ~5mm and a 12mm ordinary drill bits.
- 12mm end mill would be of help, you can do without but you’ll need a finer boring bar most likely
- A sharp right-hand boring bar, not thicker than s10k-sclcr06 (if you don’t have a 12mm end mill, s07k-sclcr06 or equivalent will serve you better).
- M14x1.5 hand tap set. This is a bit critical. You have to pay attention to what you get, because standard pitch for M14 is 2mm, you do need 1.5mm. Also, machine taps for through holes just won’t cut it, you NEED that bottoming tap. You won’t really need a handle for this.
- M10x1.5 tapping die, you won’t need even a handle for that.
Following will be rather useful if you want to get the outside ridges formed nicely:
- A mill with a vice
- A collet hexagon block
- a 4mm end-mill
You will need the following materials:
- 40mm + tolerance (say, 45mm) of 25mm teflon round stock.
How to proceed
Now, except for the difficulty with the deep threaded hole, the part seems straight forward to make: the normal order would be to turn the 17mm OD part up to the shoulder of the 22mm section, turn the 10mm boss, thread it, flip it around, bring the 22mm to dimension and face it to finished length, bore the 12.5mm hole, thread it, finished. It can be done this way, provided you cut the M14x1.5 thread on a lathe using a single-point tool. For tapping with a tap the torque necessary will exceed the gripping force of a three-jaw chuck, remember, we are making this of teflon and that’s a slippery thing. Tightening down the chuck will only result in teflon starting to flow. My first attempt – and I used a collet chuck to maximize grip – ended up in squishing the 17mm down to 16.5mm and elongating the middle part by 1.5mm. Scrap.
So how to actually do it?
- Chuck the 45mm ∅25mm blank,
- face the end,
- chamfer the edge,
- center drill it,
- drill ∅5mm 22.5mm deep, the tip of the bit counts (pay very close attention to drilling depths)
- drill ∅12mm 22.5mm deep, if you have a center-cutting bit you can skip pre-drilling with ∅5. If you have a 1/2″ drill bit AND a 1/2″ end mill, you can use it, the hole will not need boring out afterwards.
- Chuck 12mm end mill (or 1/2″ if you used a 1/2″ drill bit) if you have one, slide it into the bore before starting the lathe, start the lathe, drill the flat bottom for the hole to 22.5mm. Alternatively use a boring bar to flatten the bottom of the hole.
- Use a boring bar to increase the bore size to about 12.5..12.6mm unless you used a 1/2″ bits and the hole is already to size.
- Chuck the first M14x1.5 tap in the tailstock chuck and tap the hole using your hand to rotate the chuck. Go through all taps up to the finishing one, DO NOT WITHDRAW the last tap. Make sure the finishing tap is bottomed out in the M14 hole.
Now comes the trick: we will use the M14 finishing tap as a mandril, an arbor to hold the work in the consequent steps. It would not be a good idea was the part made even of soft metal, but we are turning teflon.
So turn the whole stuff around and chuck it by the tap. It will not run true, but it should not have too much runout. Anyway, unless it wobbles all around the place it should not be much of a problem, as the OD will be turned down by quite a margin.
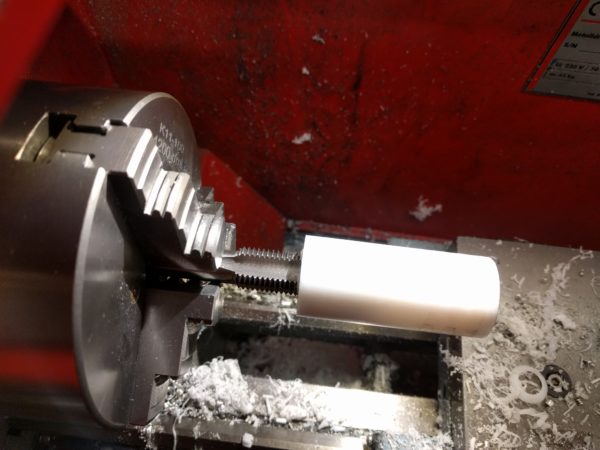
Face the end making only tiny cuts at a time, as the whole part isn’t held very stiff. Center drill the end and bring up a dead centre to support the end. This is important, make sure the end is supported as stably as possible.
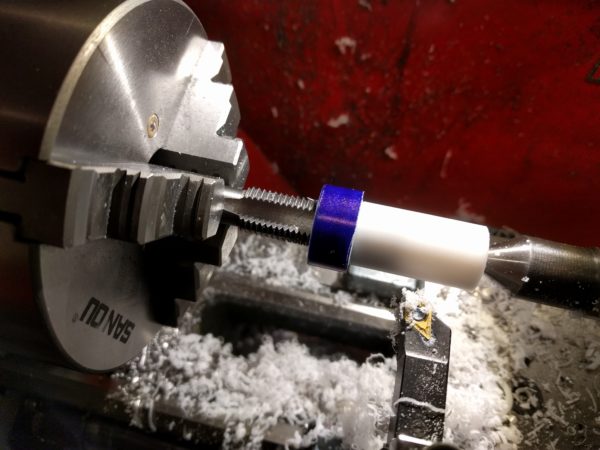
Use marking dye or whatever you have at hand to mark out the 10mm shoulder up to which to turn the 17mm diameter with some 0.3-0.5mm allowance (so 10.3-10.5mm). Turn the 17mm OD. It should end up slightly undersize, as it will have to clear a 17mm hole in a spool. The original part is about 16.85mm here.
You will face an issue with chips, or rather waffing strings of waste wrapping around the work. The trick I used is to get a small, flat ruler and make a chip baffle, see video:
The 17mm OD turned:
Then comes the 22mm shoulder and the 10mm boss with an undercut to clear thread.

Remove the dead center. Tap the 10mm boss M10x1.5 using a die (hand-held). Start the normal way, get up to the shoulder, remove die, turn around to the side without the lead-in, cut to the end. Check all dimensions, especially the 15mm length of the 17mm OD section. The M10 thread should not be longer than 15mm, no problem if it’s tad shorter.
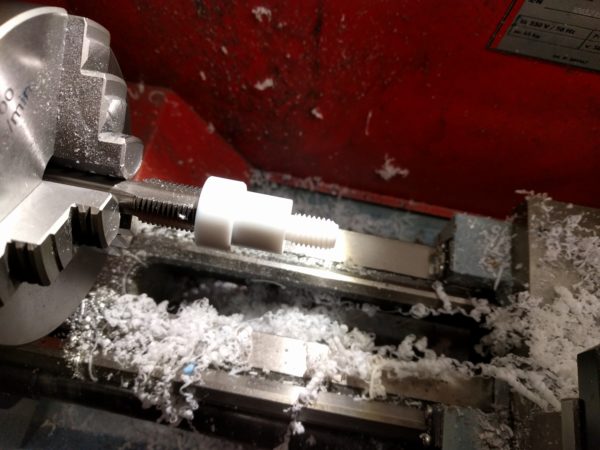
Chamfer all edges, remove the part from the mandril, turn around, face the side with the 14mm hole to bring the shoulder to 10mm dimension, chamfer the edge. Make sure not to grip the part in the chuck too hard, as it’s very easy to deform teflon. If you laid your work out properly you should anyway have only about 0.1-0.3mm to cut.
Making the ridges
Put the part again on the M14 tap, chuck by the tap in a 6-sided collet block, mill the ridges using a sharp hss 4mm end mill. This part isn’t critical. You can use a v-shaped chisel or in a pinch even an X-acto knife to cut these.
Voila.
If you liked this, consider supporting me on Patreon
https://www.patreon.com/biasedlogic
Update: the manufactured part is now in use by its owner: