So you flip the LEGO switch on your LEGO Railroad system and… nothing happens. Or the switch moves half-way and stops.
There is a post here: https://bricks.stackexchange.com/questions/11141/lego-track-switch-doesnt-close-properly describing what I was facing recently. I found a better solution than described there and a more permanent fix.
Okay, so how does the switch work?
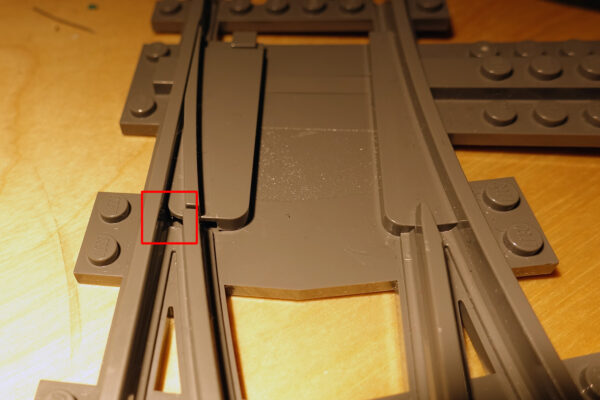
Easy, there’s the moving part (obvious, once you look at it) and a lever to move it. That would be all, if it weren’t for the necessity to provide for running through the switch (trailing point movement, going back through a switch set to the other track, forcing way through the points). Since in play it will happen, and may actually be advantageous, the points need to be spring-loaded rather than rigidly switched. For this there’s a small spring under the points:
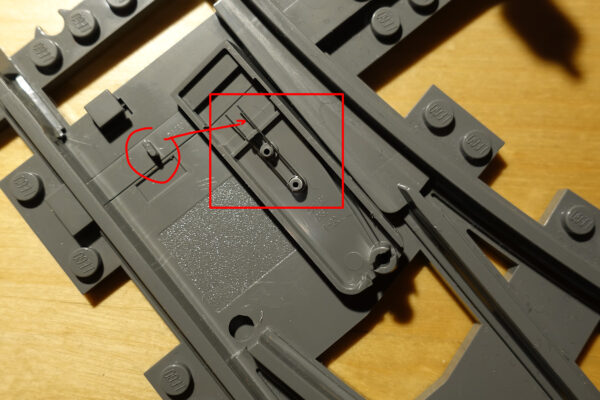
As you can see, on the underside of the points slider there’s a small spring. The yellow switch lever moves the small peg that’s circled in the photo above, it in turn pushes on that spring and this moves the points over this or that way.
If your switch doesn’t switch properly, there are two possibilities: either there’s some dirt, a grain of sand or similar between the slider and the main body of the switch. This small spring isn’t particularly strong (even a light railcar should to be able to force the switch without derailing), so any friction in the switch will cause malfunction. It may also be so, that the spring jumped off the peg, got bent, or even chose freedom and vanished. I even got some cloned switches from China where the spring was missing altogether, but that’s another story.
So, step 1: get some compressed air and blow any dust away. Should help. If it doesn’t, and/or the slider does not feel springy at all, but wobbles around, then you need to open the switch. BUT you don’t need to wreak such havoc as presented in the post linked at the beginning.
The pivot peg you need to free is right under the rail, close to the visible gap. There’s a small opening where the red rectangle shows, insert a small screwdriver or a point of not too sharp a knife and with a twisty movement try to pry up the slider as close to the rail as possible. You may try the other side too (in the center of the switch), but scratches there will cause more harm. In all switches I tried this the slider popped out without damage to the peg. Once open you can check on the spring and carefully reassemble it so that the peg goes between the spring leaves. You can only do it with the switch lever set to siding, in the straight-through position the peg is too close to the outer straight rail to get the spring hooked onto it.
Okay, and if the spring is missing or FUBAR damaged beyond repair?
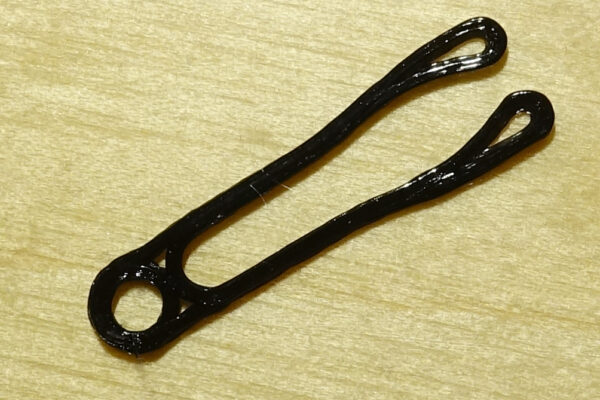
Fear not, there’s a solution. I have successfully 3d-printed replacement springs that work. I can’t vouch for longevity, but if it’s a choice of writing the switch off or giving it some extra life I consider it a win, even if it fails at some point. Just replace it again…
Here’s the STL file (zipped):
The printed spring gets installed just like the original was – put the eyelet over the small peg closer to the points pivot, the whiskers actuate the points.
I have to warn you, this print is challenging for many printers. You want a single perimeter, 0.2mm layer height (0.3mm can work too, but can just as well turn tricky), no infill, no top or bottom layers. You will want to print several springs at once (like 10) even, if you need one only. There’s very little plastic to extrude and so the printing time is too short for each layer to cool properly, if you try printing one only the whole thing may dissolve into a blob.
If you need these, I can print and send them to you in an ordinary letter. I charge €5 flat for a pack of 10 pieces sent in ordinary letter or €10 for signed-for tracked letter, no matter the destination, as long as Deutsche Post delivers mail there. No warranties on longevity, only assurance you get the same quality as that which sits in my kid’s switches 😉
Good luck fixing your points!
Thanks for sharing. Here my slightly simpler approach with household items:
https://www.1000steine.de/de/gemeinschaft/forum/?entry=1&id=446620#id446620
The thing is, using a hard spring makes it impossible for a light train to run the points (i.e. traverse the switch backwards coming from the ‘wrong’ track).
It is possible to fabricate the spring using the thinnest steel guitar string (E string, 0.28mm) as spring stock. It is pretty hard to make the spring just right, hence the idea to just 3D-print it.
Thanks for the information.
What type of filament did you use?
Just generic PLA as far as I remember. Off-brand (janbex, geetech, etc)